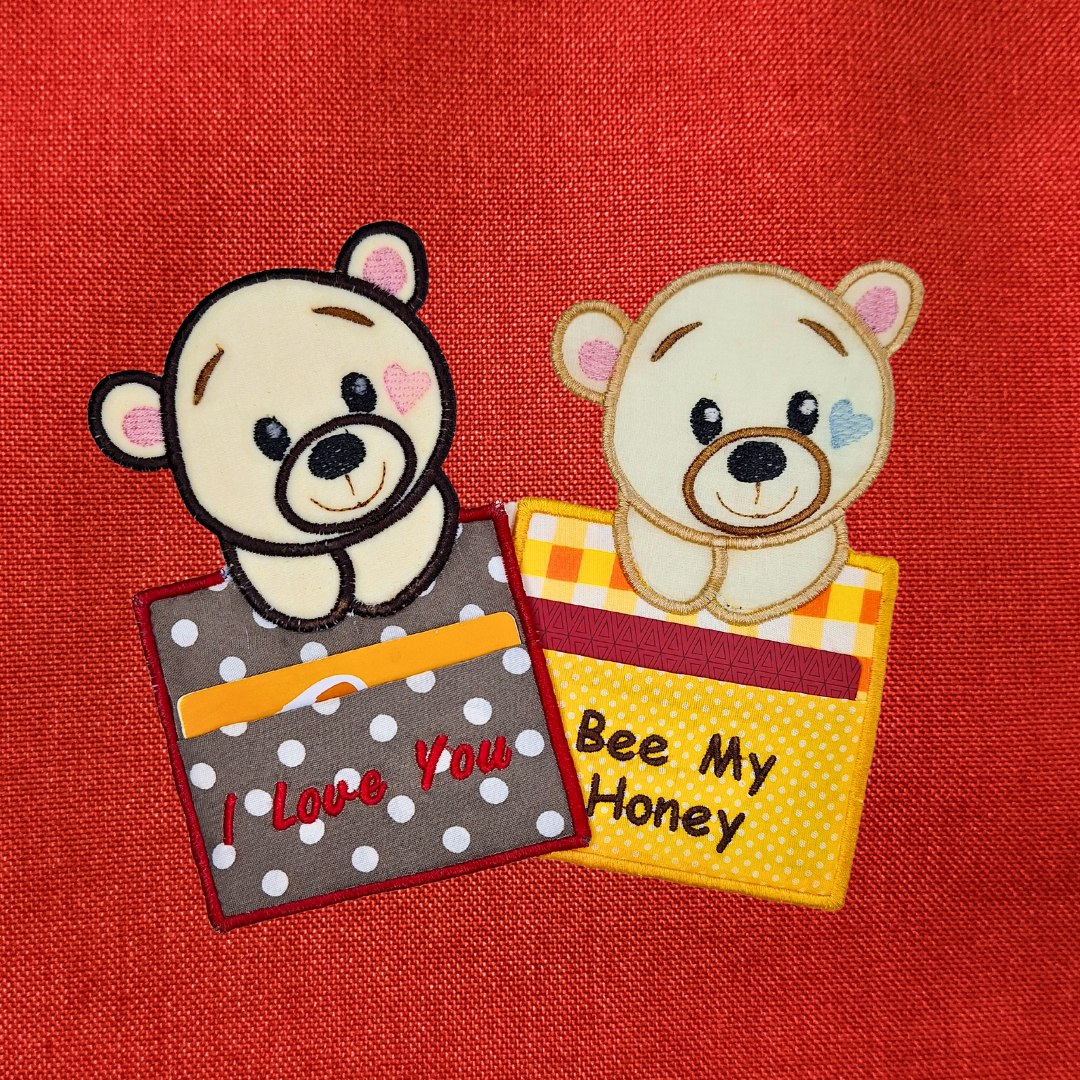
A Gift Card is a pretty amazing way to show someone they are special. Especially when you don’t know what to give. A gift card gives the freedom of choice. This Applique Bear Gift Card Holder Machine Embroidery Design is even more special because you get to make a large design in your itty bitty 4x4" Hoop.
The variety of colors and text that you can add to this gift card holder is endless, and it will make the perfect Valentine's or Baby gift.
Follow these instructions and see how easy it is to make a large design in your small embroidery hoop. It will be like you just unboxed a brand new embroidery machine.
Let's dive straight into making this cute Applique Bear Machine Embroidery Design.
Applique Gift Card Holder Instructions:
For the Applique Bear Gift Card Holder Design you will need:
- An embroidery machine with a 4x4"
- Hoop Tear away stabilizer Water-soluble stabilizer (I prefer the fabric kind)
- Iron on stabilizer(optional)
- Sharp fabric scissors
- Fabric in the colors of your choice
- Embroidery Thread in the colors of your choice, and bobbin thread
- Painters/Masking Tape
- And of course this adorable Applique Bear Design
Part 1: Pocket
INSTRUCTIONS:
Step 1
Use a square ruler or a craft mat and cut a square of fabric W 130mm(5.11in) x H 140mm(5.51in) Try to work as accurately as possible. If the square is skew, the pocket might be skew later. You may reinforce the square of fabric with some iron on stabilizer. This will only be necessary if your fabric is very thin. Try not to use fabric that is very thin or fabric that ravels a lot.
Mark the middle line horizontally and vertically with a fabric marker.

Hoop 2 layers of tear away stabilizer, and mark the center of the hoop using your hoop guide.

Load your choice of text onto the machine. You will see that the text is centered so you need to move the text to the middle of the bottom half of the fabric square. The bottom half of the square is going to be the front of your pocket.
Step 2
Position the square of fabric as accurately as possible matching up the marks on the stabilizer on the hoop and secure with painters/masking tape on the edges of the fabric.

Step 3
Load the hoop on the machine and embroider the text on the bottom half of the fabric below the horizontal line. Remove the hoop from the machine. Carefully remove the painters/masking tape and unhoop the square. Remove the stabilizer and fold the square in half and set aside.

Part 2: The Pocket Base
Step 1
Hoop two layers of water soluble stabilizer. Load part 2 (which is the pocket base onto the machine. Place the hoop on the machine and embroider the first placement line.

Step 2
Cut a thin square of batting a little larger than the embroidery area and position it over the placement line. Secure with painters/masking tape. If you prefer not to pad the pocket base you can omit this step.
Tip: When I want to pad a project but I don’t want it too thick or I don’t have batting on hand, I use polar fleece.
Step 3
Place a square of fabric (the same size as the batting) on top of the batting and secure with painters/masking tape. Turn the hoop upside down and place a square of fabric, a little larger than the embroidery area over the placement line and secure with painters/masking tape. The color of the fabric at the back can differ from the front fabric if you prefer.


Step 4
Place the hoop on the machine and embroider the second placement line. Remove the hoop from the machine and carefully remove the painters/masking tape, being careful not to stretch or pull the stabilizer.
Cut away the excess fabric around the embroidered border in the front and back. Be careful not to pull on the fabric, this may cause the stabilizer to move or stretch.

Step 5
From the bottom line of the pocket base, mark 50mm (1.96") up and mark on each side of the pocket base. This is the placement line for the pocket.

Step 6
Place the pocket with the top fold in line with the placement lines that you have marked on the pocket base and the vertical line in the center so that the text is centered. Secure with painters/masking tape being careful not to place the tape over the embroidery line. It is quite hard to remove the tape once it has been embroidered over.

Step 7
Place the hoop on the machine and embroider the zig zag line to secure the pocket and base.
Tip: Make sure that the embroidery foot doesn’t get caught on the pocket top. You can press the fabric flat when the foot is close to the open side of the fabric.
Remove the hoop from the machine and cut away the excess fabric from the pocket close to the embroidery line, taking care not to pull on the fabric.

Step 8
Use a bobbin with the same color thread as the thread you will be using for the satin stitch. Place the hoop on the machine and embroider the last step which is the satin border. Note that the top center will not have a border line. This is where the pocket will be attached to the bear.
Remove the design from the machine and unhoop the design. Cut away the excess stabilizer around the pocket border. Cut any loose threads. Place the pocket aside.


Part 3: Applique Bear
Step 1
Finally we can start the applique bear. Hoop 2 layers of water soluble stabilizer. Load Part 3 (the applique bear) design onto the machine.
Place the hoop on the machine and embroider the first placement line.
Step 2
Cut a square of fabric, a little larger than the embroidery area. Place the square of fabric on the hoop, making sure the fabric is a little larger than the design. Secure the fabric with painters/masking tape.

Step 3
Embroider the second placement line to secure the fabric. Remove the hoop from the machine and cut away the excess fabric around the border of the bear, taking care not to pull on the fabric. Place the hoop back on the machine and embroider all the detail of the bear up to just before the (yellow) zig zag stitch.

Step 4
Embroider the second placement line to secure the fabric. Remove the hoop from the machine and cut away the excess fabric around the border of the bear, taking care not to pull on the fabric. Place the hoop back on the machine and embroider all the detail of the bear up to just before the (yellow) zig zag stitch.
Attach the pocket to the bear by aligning the top of the pocket to the hands of the bear. Make sure that they align as accurately as possible. Secure the pocket to the bear with painters/masking tape. Turn the hoop upside down and place the batting and the fabric for the back on the hoop and also secure with painters/masking tape. Place the hoop on the machine and embroidery the zig zag stitch. The pocket should now be attached to the bear.

Step 5
Use a bobbin with the same color thread as the thread you will be using for the front. Place the hoop back on the machine and embroider the satin stich of the bear.

Step 6
Remove the hoop from the machine and unhoop the design. Cut away the excess stabilizer around the border and also the back of the bear. Cut away any loose threads.
You can now give your new Applique Bear Gift Card Holder a rinse in warm soapy water to completely remove the water soluble stabilizer. Let the Gift Card holder dry and give it a quick ironing if necessary.


If you enjoyed crafting this butterfly with us, let us know in the comments and share your beautiful butterfly crafts with us.
